… Years ago on one of our first dates, we were sitting in a Tapas Bar back in Manchester, UK – it’s called Bar San Juan if you ever happen to be in the city and looking for an authentic and amazing Spanish experience give them a visit. It was our go-to place for many many years before we actually moved back to Spain, ha!
So yes we were there, comfortably full but still some room for dessert – as always – and my boyfriend said “ayyy, try this cheesecake!!!” and I told him I’m actually not a big fan of cheesecakes – you know those classic dense “New York Style” ones with crushed biscuits on the bottom, and fruity bits and jam on top… Then he said, “yeah, but this is not like that.” I was like okay, I mean since he has these big ocean-colored eyes, I totally believe whatever he says anyway, so why not, let’s get it…. and I remember that first bite blew my mind out of my head, and immediately became my favorite dessert of all times…
… yes, it is THAT good.
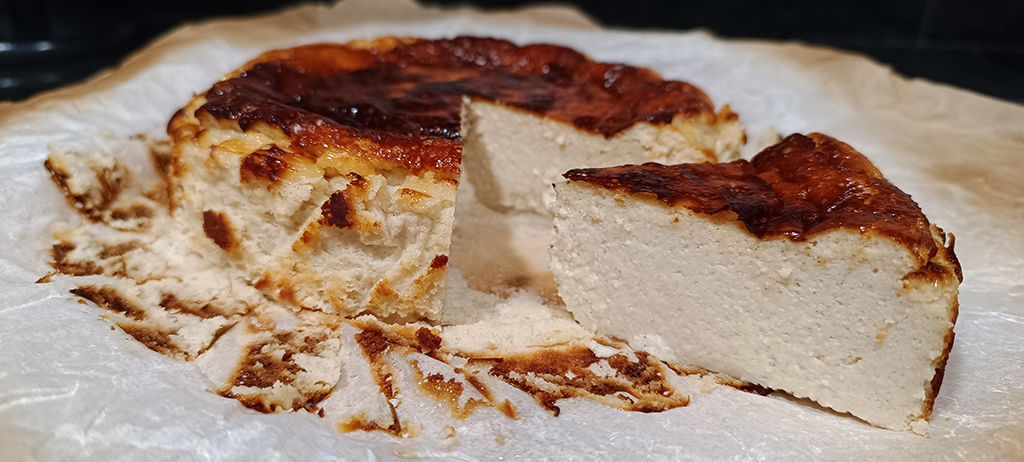
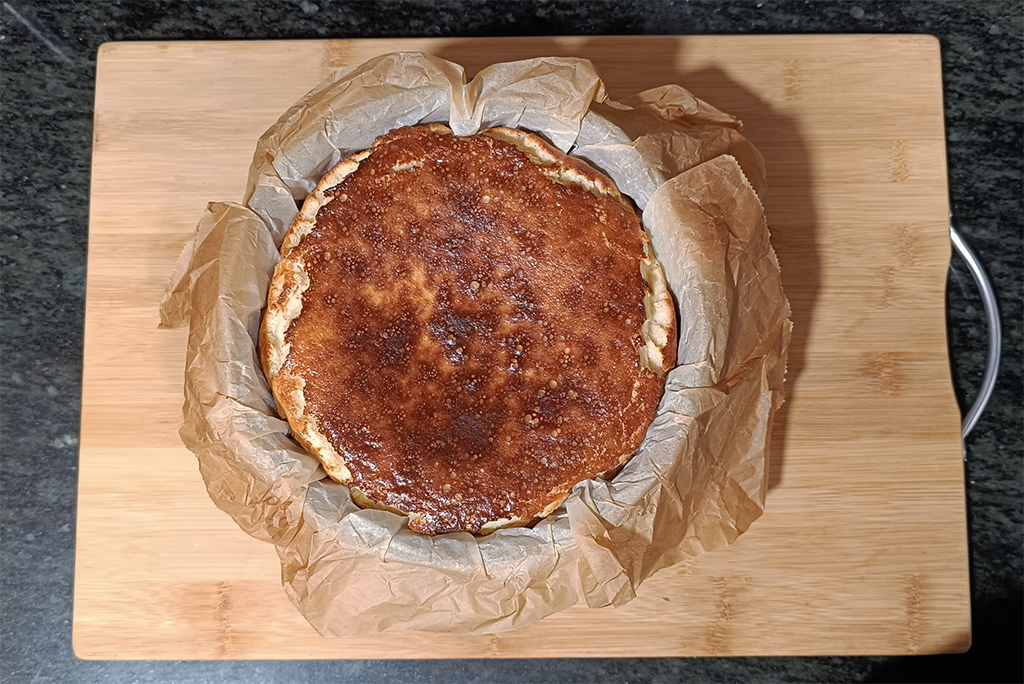
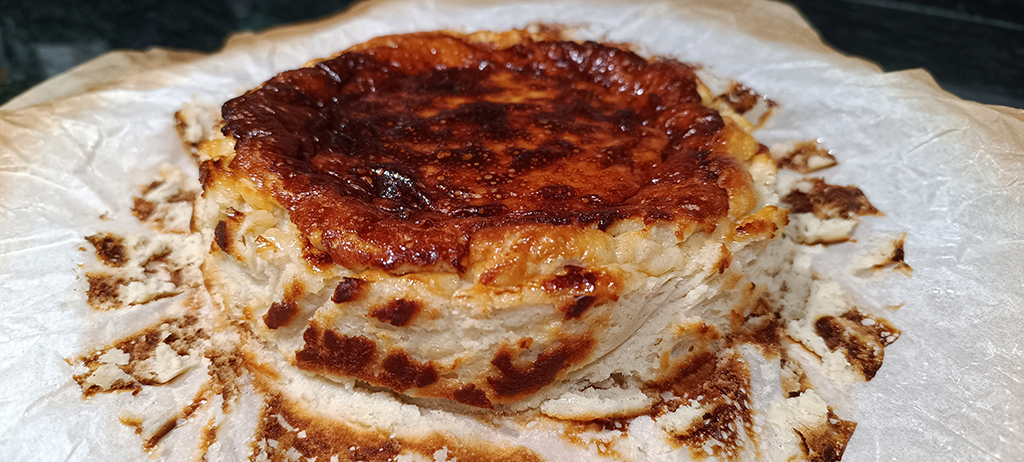
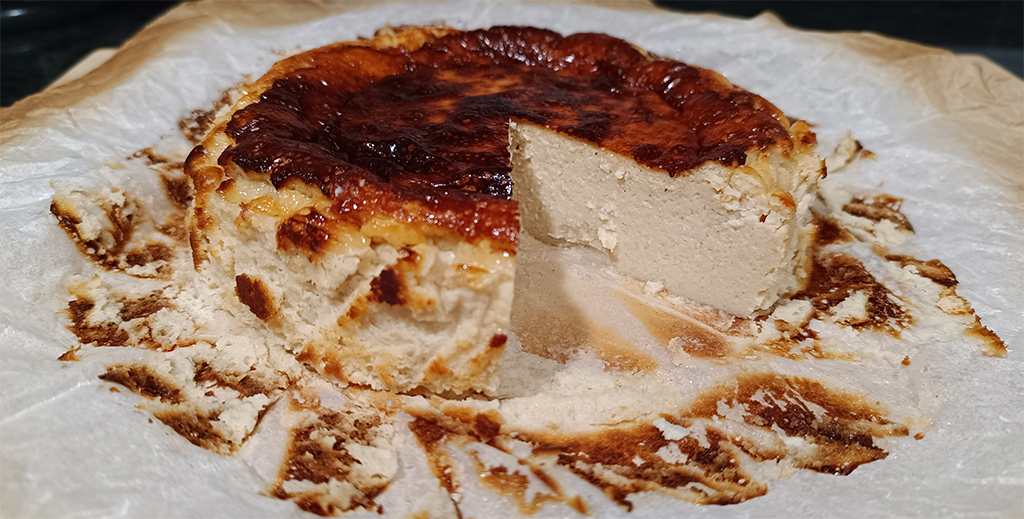
The Basque “burnt” cheesecake recipe was created decades ago in a restaurant called La Viña in San Sebastian in the North of Spain. It is a very light, airy, creamy, and crustless cheesecake with a delicious “burnt” – okay, caramelized…- outer layer. So yes, it’s breaking all the cheesecake rules but believe me, it’s absolutely delicious and it’s probably the easiest recipe EVER… – I promise the longest step in the whole baking process is to wait for it to cool down before slicing up your Tarta de Queso…
Ingredients:
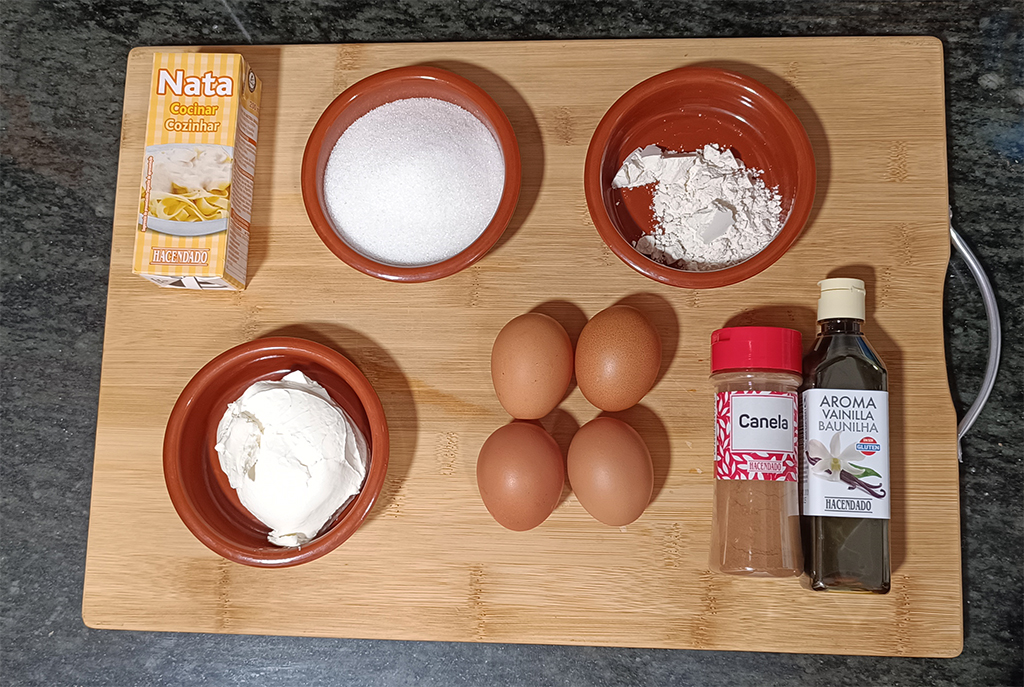
- 500 g Philadelphia cream cheese
- 200 g sugar
- 15 g flour
- 100 ml heavy cream
- 4 eggs
- 1 teaspoon of cinnamon powder
- Few drops of vanilla extract
* These measures are for a 20 cm baking tin.
⏱️ prep time: 5 minutes
⏱️ baking time: 40 minutes
🌡️ baking temperature: 220°C
Some side notes before we start:
– It’s recommended to use full-fat Philadelphia cream cheese, but I’ve made this cake a million times by now, and sometimes with all the possible changes in the cream cheese section:
I tried it with light cream cheese – to save some calories – also with lactose-free, and there were times when I couldn’t find Philadelphia so I used unbranded – same, people… It’s all the same.
The only difference I noticed was the lactose-free version, somehow the texture felt a bit more dense – but still delicious, duh.
– you can bake it for more or less time. I like it when it’s still soft and a bit creamy in the center – that’s what 40 minutes gives perfectly, in my oven. But please, feel free to experiment – and let me know in the comments below how it goes – bake it for less if you like a texture that is more creamy or for more time if you prefer a “well-done” cheesecake. Also if the top isn’t brown enough, you can turn the oven to the “top” function to caramelize it – keep an eye on it, the top will burn fast.
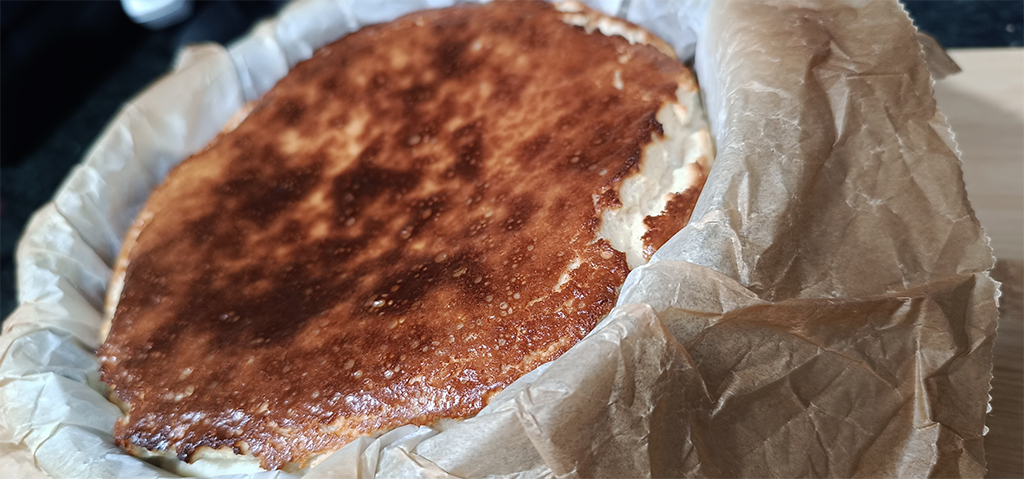
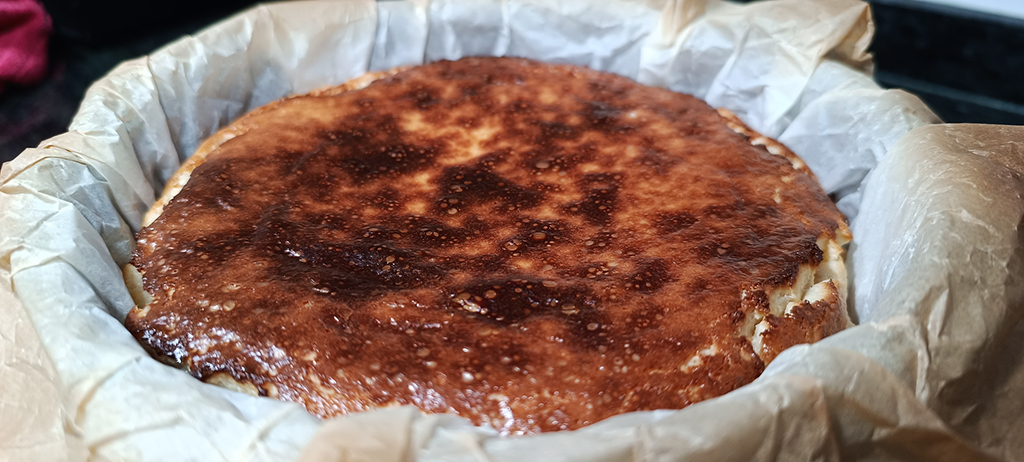
– don’t worry about the perfect looks. This cheesecake is not meant to look pretty like the New York Style – it is broken at the edges, burnt on top, and to hell with popping the bubbles… It’s rustic and uneven and we love it.
Now let’s start because I said the prep time is like 5 minutes and we are here chatting about cheesecakes for like an hour now 😀🙏
SooOoOo…
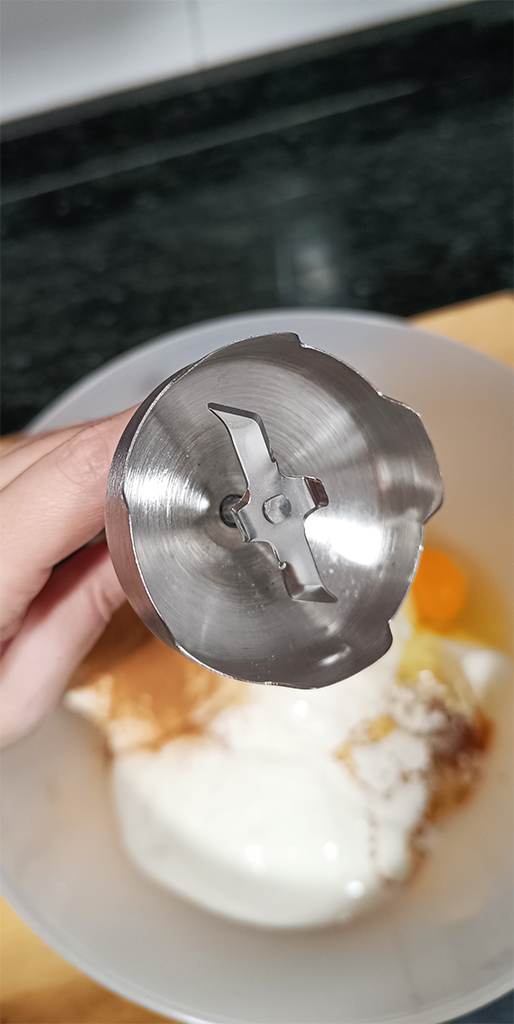
- Put all the ingredients listed earlier in a big ass bowl and mix it all together with this weapon.

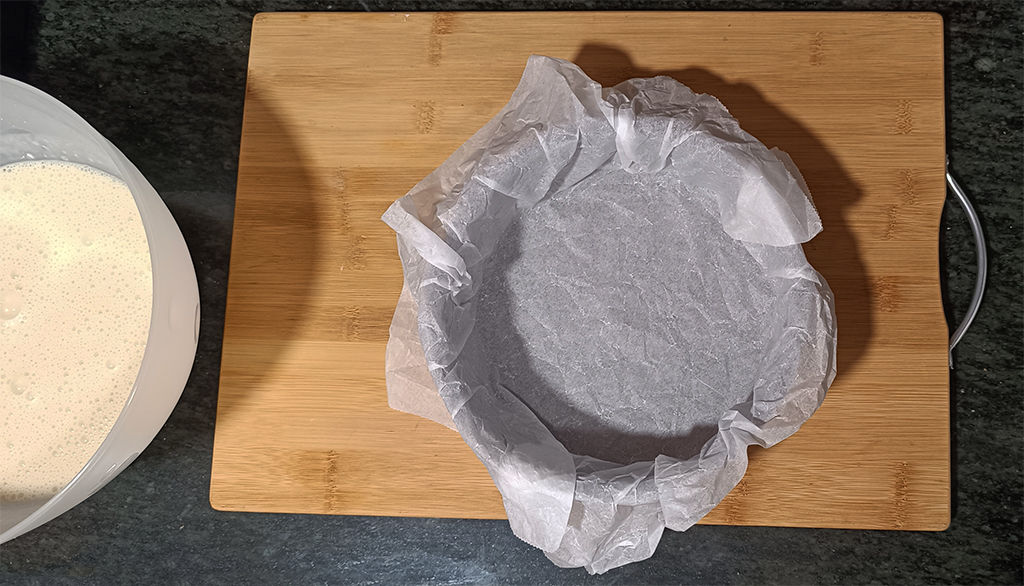
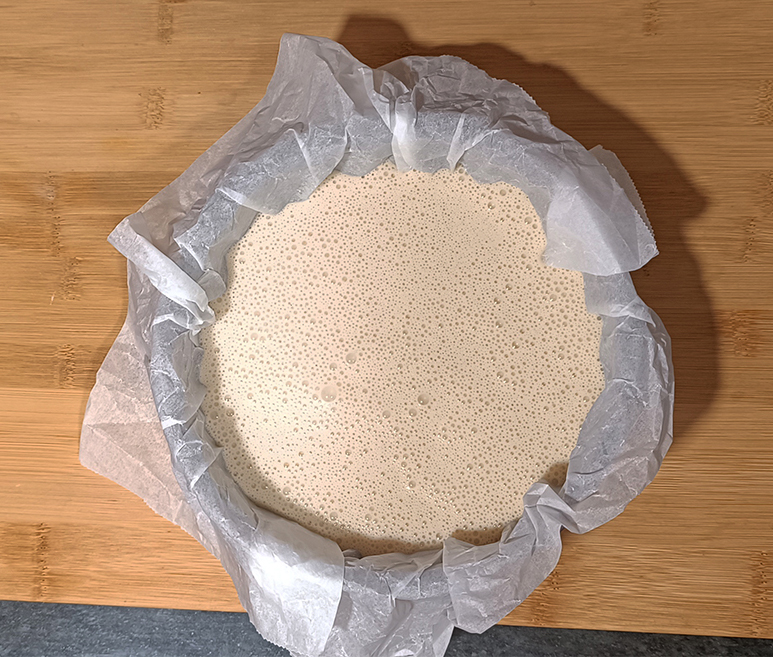
- Put a baking sheet in the tin, make it with one piece of paper so the liquid stays inside.
- Pour our dough or whateverthisis in the tin
- Bake it in a pre-heated oven at 220°C for 40 minutes.
Aaand, pretty much… that’s it guys – see, I told you it’s gonna be super-fast and super-easy.
One thing tho, when it’s done it’s gonna rise up a bit, like double up the size so don’t be surprised – but once it starts cooling down it’s gonna lose that jiggly texture and a bit of that fluffyness.
ahhh… I know!
… and now we will try to be very strong, and leave it as it is because we have to wait a few hours for it to cool down at least to room temperature before slicing it up – unfortunately.

………..
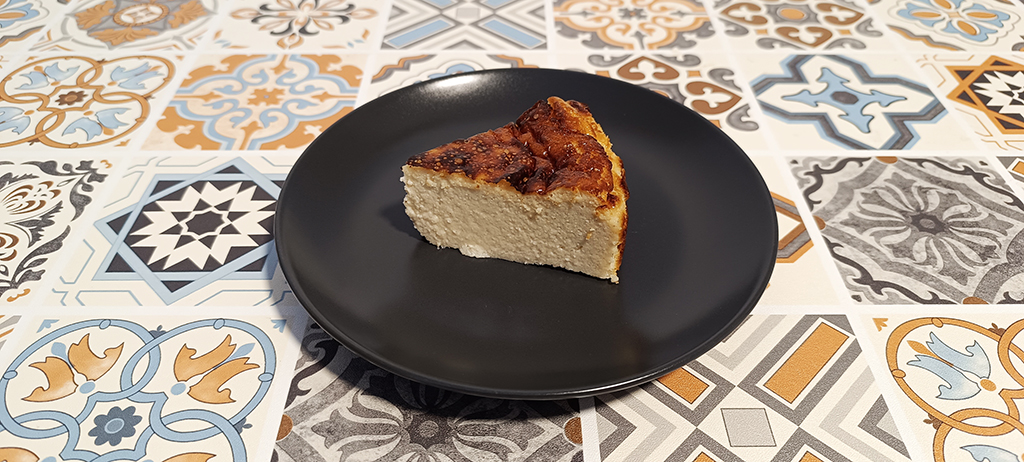
Boom, here we are again a few hours later in the afternoon, right on time for a cup of coffee and a slice of fresh Tarta de Queso for merienda!
Perfection.
All you need to do now is peel off the baking paper carefully, and please… just enjoy!

¡Aaay, madre mía!
I literally just ate a slice, but I can’t stop eyeballing these pictures and the leftovers in the kitchen … 👀
See you at the next one,
Noémi
______________
Ps.: If you enjoyed this post, please let me know and hit the ★Like button, don’t forget to Subscribe – leave a comment, and share the love on your socials!
… Aaand if you want to hang out with me between uploads, follow me on Instagram and Facebook for daily and more personal updates!
Discover more from The World Through My Glasses
Subscribe to get the latest posts sent to your email.

Om nom noms!! 😀
LikeLiked by 2 people
Looks so good!
LikeLiked by 1 person
Sounds yummy!
LikeLiked by 2 people
Been baking these for years, pure indulgence, Nay, decadence !
LikeLiked by 1 person
Me too! It’s so easy to make… And sooooo easy to eat!
LikeLiked by 2 people
They’re a great advertisement for gluttony 😊
LikeLiked by 1 person
I just had this 2 days ago. Can’t wait to bake one. Thanks for all the tips.
LikeLiked by 1 person
You’re welcome! … And let me know how it goes 😊
LikeLiked by 1 person
Thanks, now a want this!! 🤩 Today!! 😋
LikeLiked by 2 people
It’s super easy to make! There’s still time to bake one for today’s lunch 😊
LikeLiked by 1 person
Looks amazing! Going to try 🙂
LikeLiked by 2 people
thank you! …. And let me know how it goes when you bake it 😊
LikeLiked by 1 person
😍😍
Looks really good
LikeLiked by 1 person
Looks delicious! When I get back to my oven later in the year I will def try this.
LikeLiked by 2 people
let me know how it goes when you give it a try 😊
LikeLiked by 1 person
Definitely going to give this a try!
LikeLiked by 2 people
happy to hear! Let me know how it goes!
LikeLiked by 1 person
This is delicious
LikeLiked by 2 people
omg! Thank you so much for sharing this recipe! I was in San Sebastián last October and had some! I am going to make it!❤️
LikeLiked by 2 people
you’re very welcome! Let me know how it turns out! I hope it will magically transfer you back to San Sebastian 😊
LikeLiked by 1 person
“same, people… It’s all the same.”
I had to laugh at this very helpful line! 😁
Thanks, I’ll give it a try. 😋
LikeLiked by 1 person
hahaha, but it IS the same – I promise! Let me know how it goes when you give it a try! 😊
LikeLiked by 1 person
Looks delicious!
LikeLiked by 1 person
Wow this looks awesome. 😛
LikeLiked by 1 person
I baked it! It was great! Thank you so much. I would send a picture if I knew how.
LikeLiked by 1 person
oh!!! I’m so happy to hear this! You’re very welcome 😊 you can drop the picture if you want through a message on the facebook page: https://www.facebook.com/profile.php?id=61566047327547
LikeLiked by 1 person
It looks absolutely delicious!
LikeLiked by 1 person
This looks delicious!
LikeLiked by 1 person
I guess I won’t make it myself…….. but just forwarded your post to my partner, as she is a better cook than I am. Looking forward to tasting results! Previous successful experiments, Christmas Pud, Mince Pies and good old English trifle!!!!
LikeLiked by 1 person
hahaha, it’s so easy to bake, I promise you could do it yourself! 😊 … Let me know how it goes 😊
LikeLike
Yummy 😋 sounds good
LikeLiked by 1 person
Thank you for visiting my blog site💐
LikeLiked by 1 person
Actually, I could do without the New York Style’s crust. This sounds wonderfull!
LikeLike
Looks delicious. I made a Basque cheese cake a few months ago. Here in Idaho we have a Basque community. In spring and summer months they have public gatherings with dance and good.
LikeLike
I will try this recipe. Thanks.
LikeLiked by 1 person
Yum
LikeLike
Great, well done, best wishes and prayers
LikeLiked by 1 person
Looks so good 🤩
LikeLike
Thank you for sharing the recipe. Looks delicious!
LikeLike
Basque cheesecake done right! Love it!
LikeLike
It looks so delicious, I will try it 👍
LikeLike
Yummo!🌲
LikeLike
Looks amazing. I’ll try it this week to cap off a Spanish feast.
LikeLike
Looks, and sounds, delicious.
LikeLike
looks and sounds great. I will definitely give it a try
LikeLike
I don’t blame you for a lack of will power!
LikeLike
Lovely, love the name and how colorful it is, ‘burnt’
LikeLike
Hummmmmmm, reminds me great things
LikeLike
Noemi! This is the best tasting cheesecake ever! I live at 3000 meters and I used your recipe, didn’t change a thing, and it turned out perfect! Thank you for this delicious creamy cheesecake that is not too sweet!
LikeLiked by 1 person